
Online Demo / Training – Clinic Management Software
1) All our Main Menu are on left hand side. When click the Main Menu on left hand side. Sub-menu on the right would change accordingly.
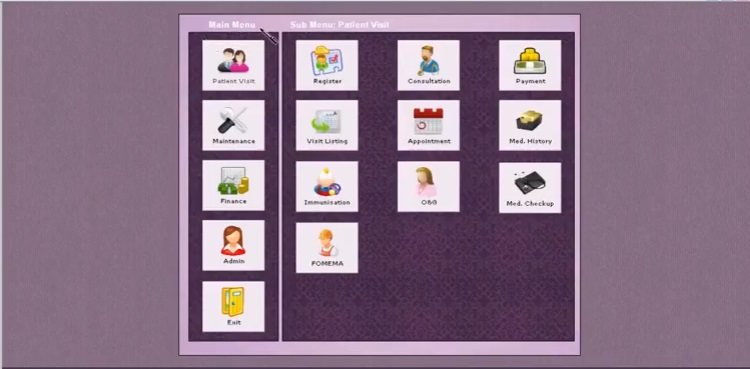
2) On the first Main Menu…Patient visit. There are 3 main sub-menu on top. Registration, Consultation and Payment.
Registration
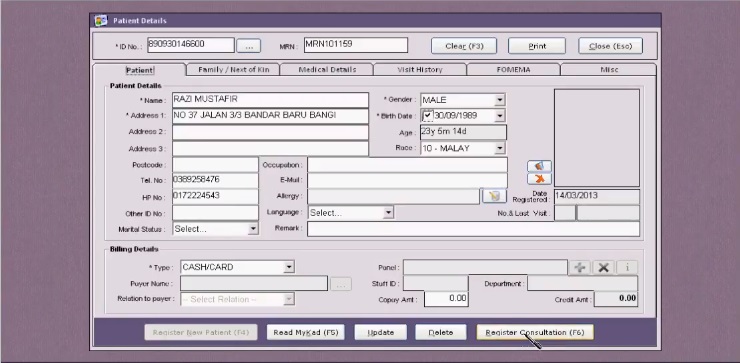
3) Click the first sub-menu……Register
 Registration – Clinic Management Software ( CMS )
4) On the Registration screen. You can key in the patient’s particular manually or can click “Read Mykad” at the bottom. Then click “Register Consultation” at the right bottom. If your clinic have the necessary hardware to use the “Queue Management System“. A bell would ring when there is patient Register. This is to inform Doctor business coming in if the doctor at the wash room or doing some other thing.
Consultation
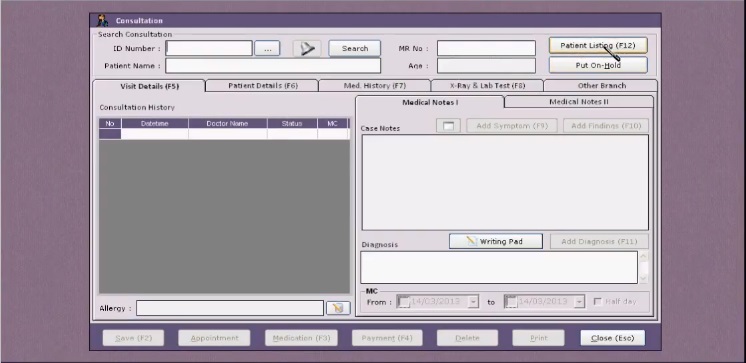
“Consultation” sub-menu by Doctor.
 Consultation 1 – Clinic Management Software ( CMS )
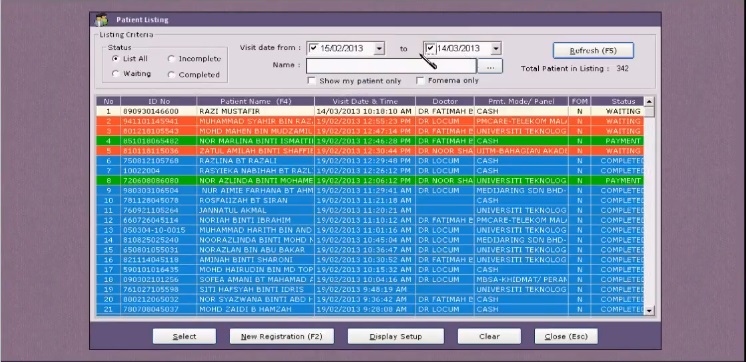
1) Doctor can click “Patient Listing” on top right.
2) When click “List All” on top left.
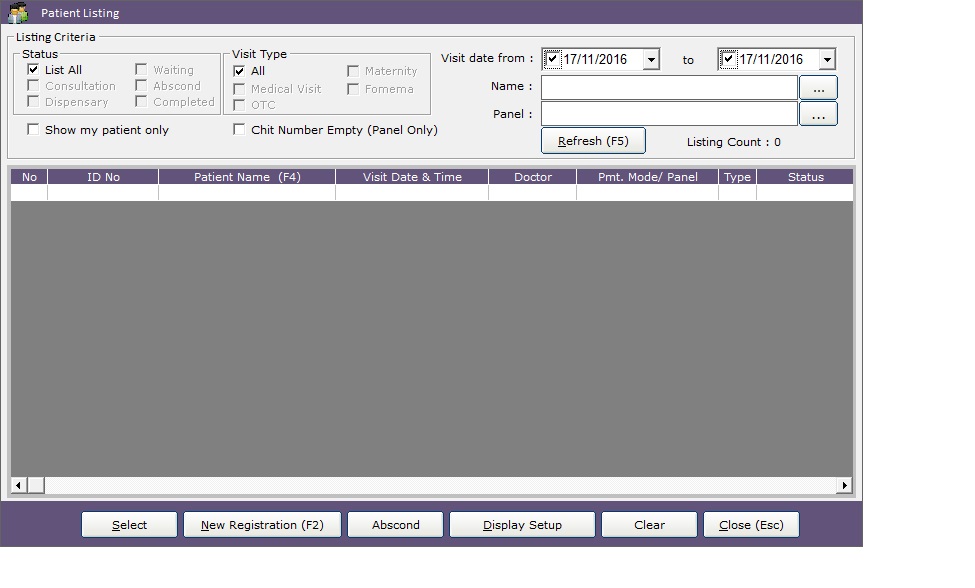
3) Then, doctor can see all the patient, show in different colour. Blue has been completed today. Orange is waiting and Green in Payment stage.
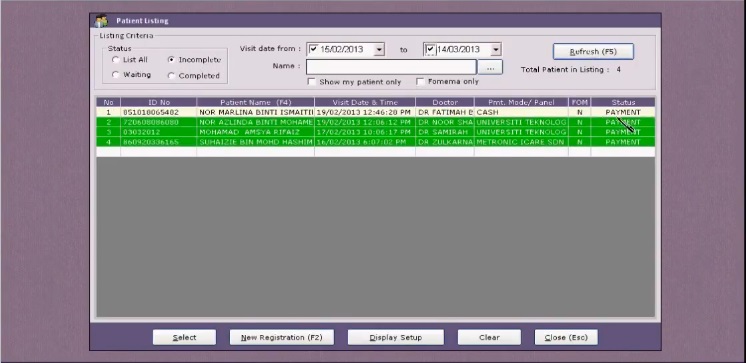
4) Alternatively, doctor can view only those at payment stage by click “Incomplete” on top left and then click “Refresh” on top right.
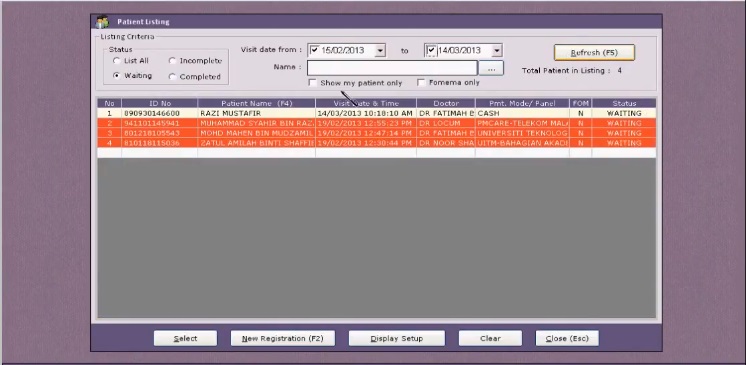
5 ) Again, doctor can view those in the “Waiting” only by clicking top left “Waiting”.
6) Doctor can select the patient he/she want to call and then click “Select” at left bottom
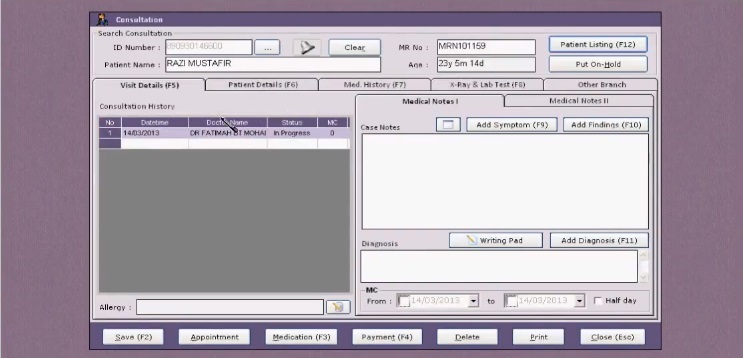
7) Then doctor can call out all the pass record of that particular patient.
8) Once ready, doctor can click the “bell” on top left middle to call next patient come in. The “Queue Management System” will call the next number (101) to come in to the room 1 or room 2 with voice.


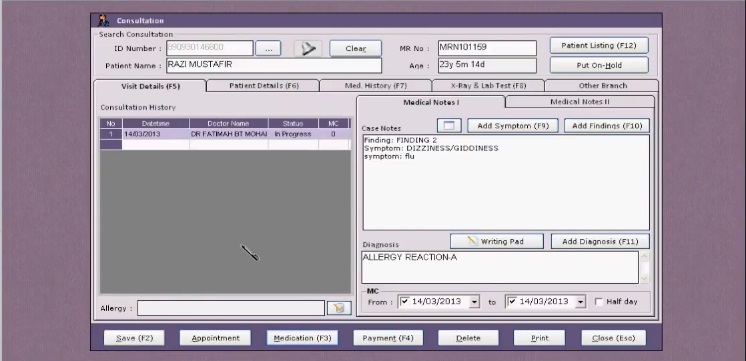
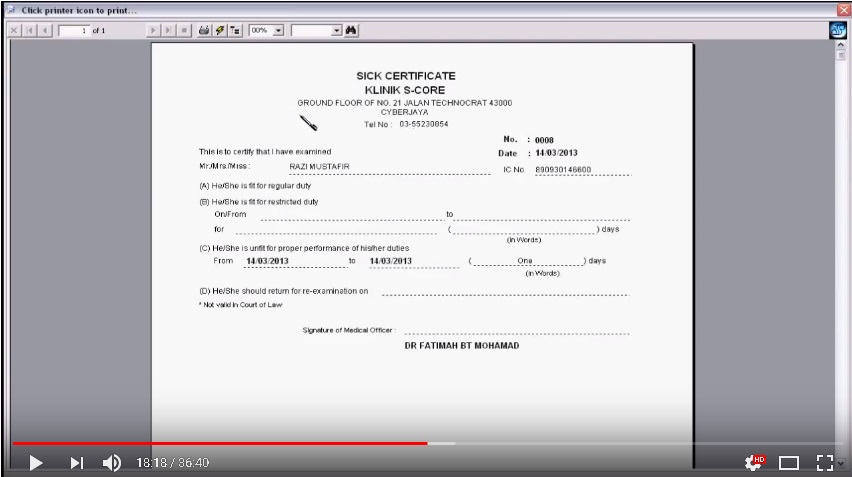
9) Doctor can input all the consultation ( View the video) .Then , can click date of MC at the bottom if want to give MC to the patient.
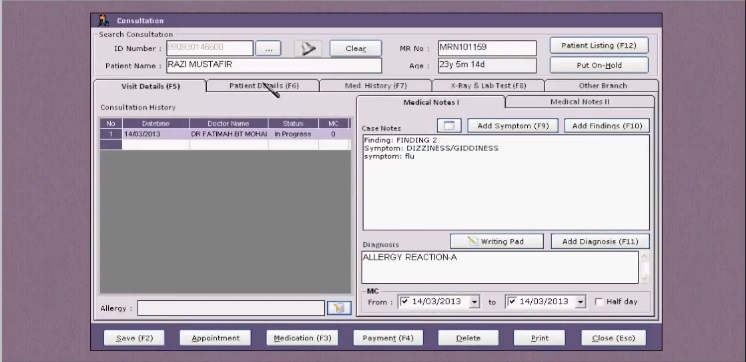
10) Doctor can click “Medication” at the bottom

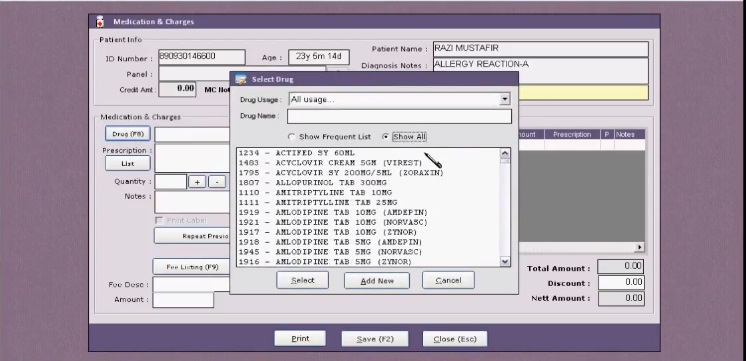
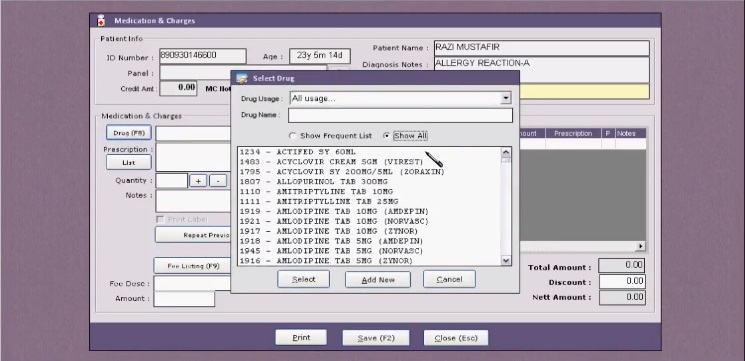
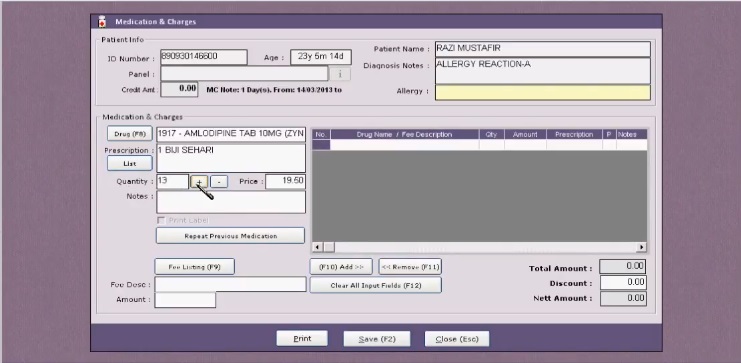
11) On “Medication & Charges” screen. Doctor can click “Drug”

12) Doctor can select the Drug from a Drop Down Menu.
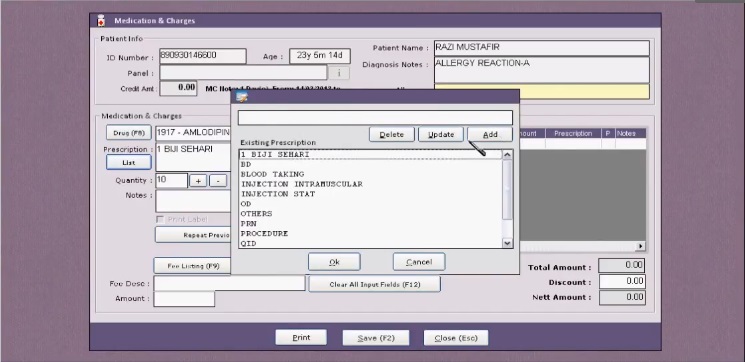
13) Doctor can click “List” on Prescription
14) Doctor can select from drop down menu or type his/her own Prescription on top
CMS )
15) Doctor can click + or – to change the quantity and price on right will change accordingly.
16) Then click “Fee Listing”

17) Doctor can then select pre-set standard fee charges from a drop down menu
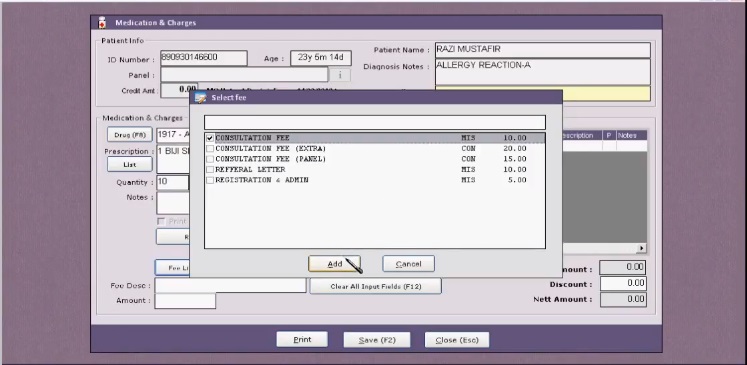
18 ) Click “Add” to add the “Fee” charges
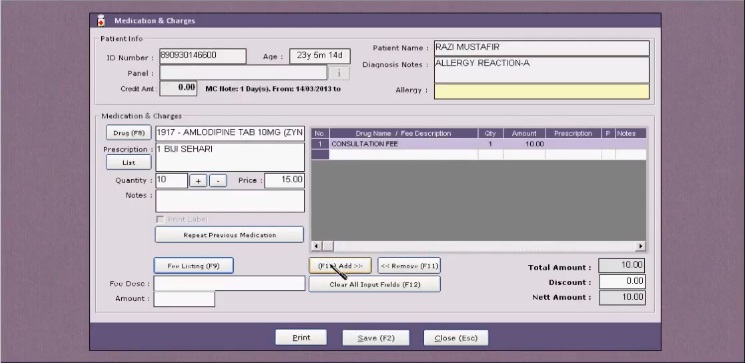
19) Doctor can give discount to patient
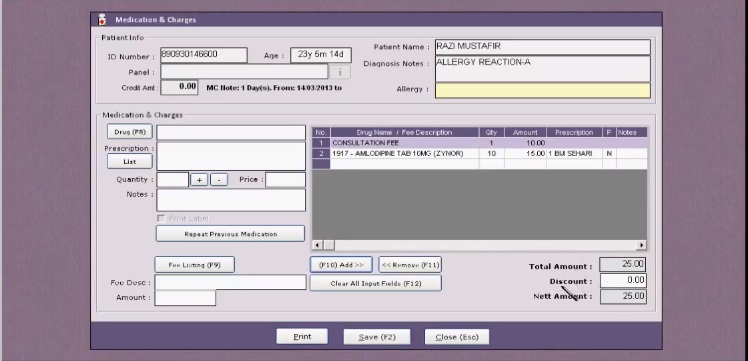
20) Once click “save” at the bottom. Doctor will back to “Consultation” screen
21) Doctor then click “Save” to send the record to “Payment & Dispensary”
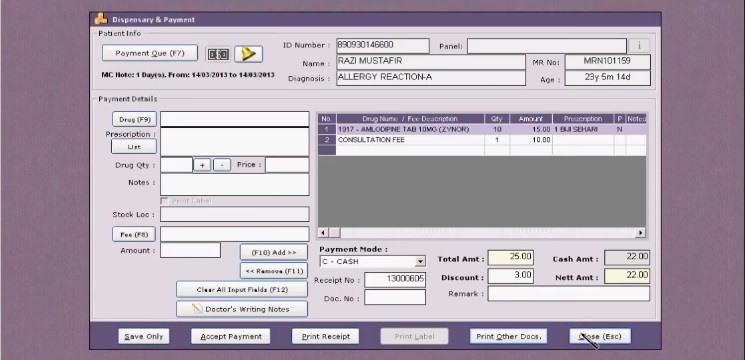
Payment & Dispensary
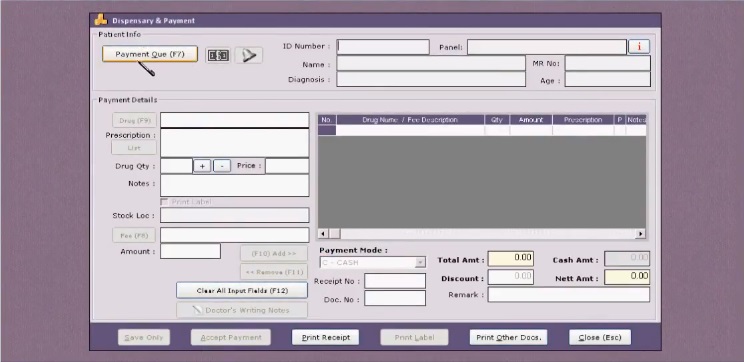
1) Staff can click “Payment Queue” on top left.
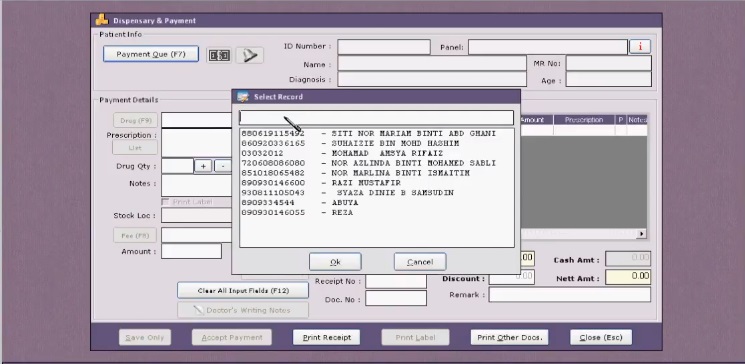
2) Select the patient
3) Click “Doctor Writing Notes” to prepare the medicine.
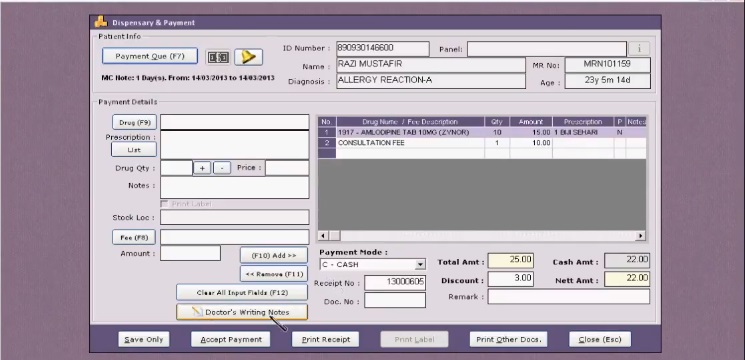
4) Click the “bell” on top to call the patient if have “Queue Management System“
5) Select “payment option” from drop down menu
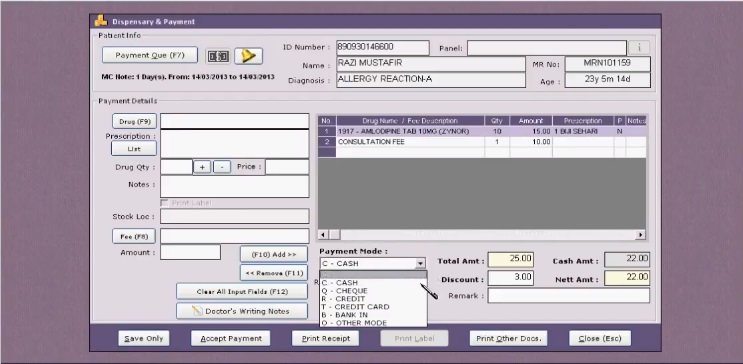
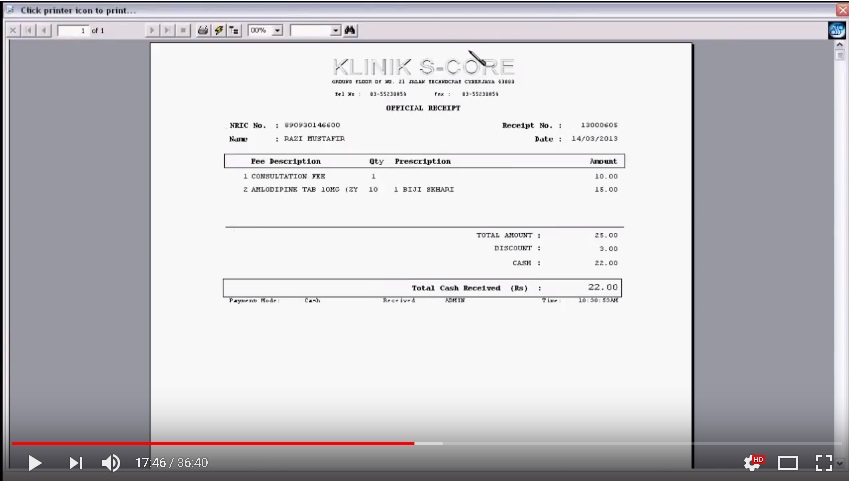
6) Once click “Accept Payment”, then click “Print Receipt” at the bottom

7) Receipt will show on the screen for printing.
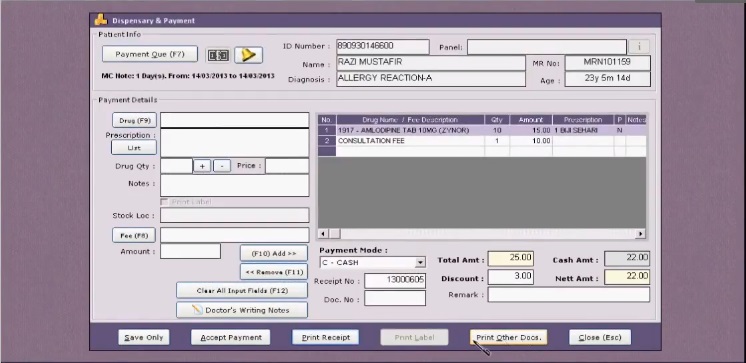
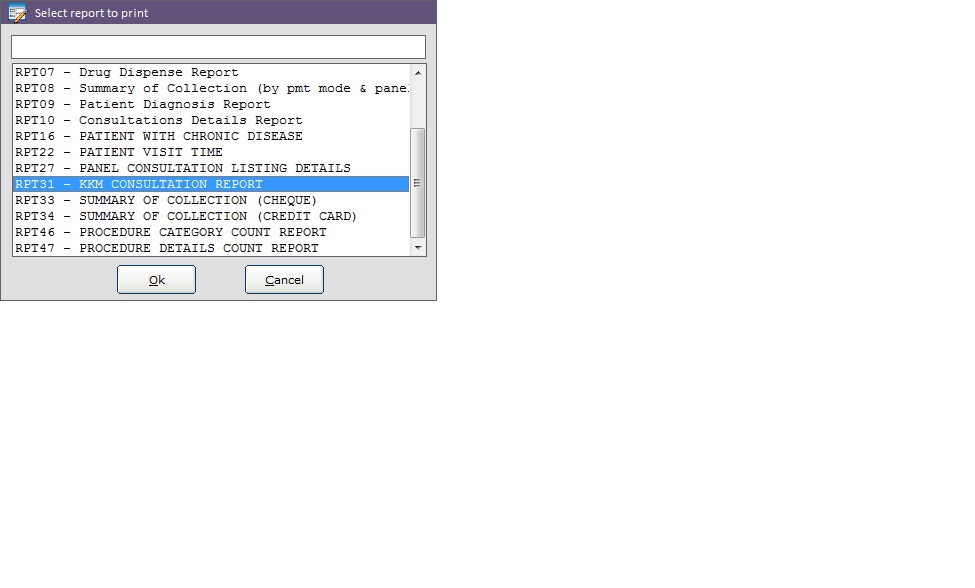
8) Click “Print other document” ( Can print before calling patient )
9) Select the document. eg : MC etc.
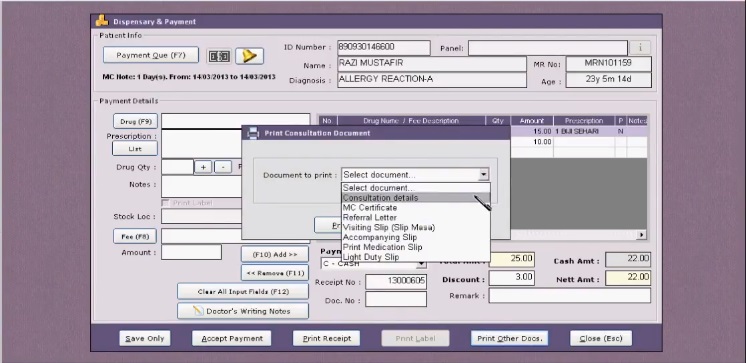
10) Again, document will show on screen for printing.
11) Click “Close” once completed.
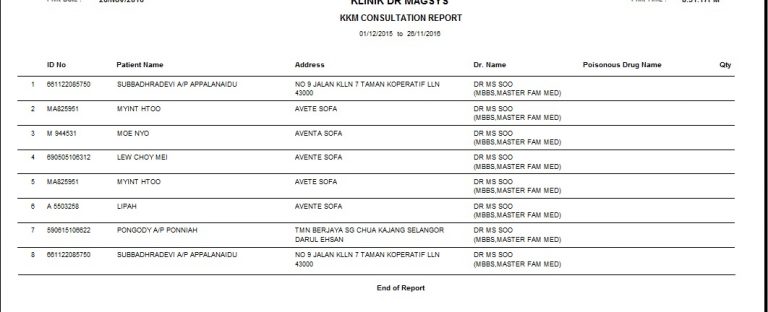
Report
KKM Report
Watch the full video as follow :